
How to Nail Your Quilt Pattern Cover Shot: A Formula for Non-Photographers
- Jan 27
- 7 min read
Quilt pattern cover photos cause a disproportionate amount of stress for designers. Not because they’re technically difficult, but because most designers approach them without a system. The result is a lot of overthinking, a lot of trial and error, and a lingering sense that you’re somehow “bad at photography.”
You’re not.
What you’re missing is a formula; one that consistently produces clean, professional cover images without requiring expensive equipment and a fancy studio.
I was not a natural photographer. I still wouldn’t call myself one. But I can reliably get a cover-worthy quilt photo in about 30 minutes, start to finish, because I’ve removed decision-making from the process. This post breaks down exactly how I do that, step by step.
Contents
The role of a quilt pattern cover photo
A quilt pattern cover photo is not decorative fluff. It has a job.
At minimum, it needs to:
Clearly show the quilt design
Communicate scale and proportion
Be professional
Align with your brand aesthetic
And most importantly: be aspirational
In short, you want the cover quilt to make a potential customer fall in love with the design and hurry to make a purchase.
A well-written pattern paired with a weak cover photo falls flat. Your customer won't say it, but they feel it. If the cover image looks awkward, washed out, or crooked, it subtly erodes trust before the pattern is ever opened.
You don't need to be artsy-fartsy, just clean and confident

Lighting, Lighting, Lighting
Indoor quilt photography is far harder than most designers expect. Even with supplemental lighting, quilts photographed indoors tend to look flat, dim, or yellow. If you want a specular photo, you want natural sunlight.


Natural light does a tremendous amount of work for you, particularly when it comes to color accuracy and texture. With all our technology and innovation, I have yet to find anything that substitutes for good old sunlight. And the best part is, it's FREE!
If you take nothing else away from this blog post, take this: photograph your quilts outside.
Outdoor photography offers:
Brighter, more even light
Better color accuracy
Natural shadowing that reveals quilting texture
No need for specialized equipment
If your brand uses bold, saturated colors (like mine), full sun works well and can be corrected easily in post-processing. The experts will tell you not to do this because it can lead to washed-out colors, but I can correct that with some simple editing and it works great for my branding and aesthetic.

If your palette is softer or more muted, lightly overcast days are ideal. The clouds act as a filter to the lighting isn't quit so harsh. Either way, natural light is doing the heavy lifting.
Finding the right location
So I've convinced you to take your photos outdoors, how do you find the right location?
You can use anything as a backdrop. If you have a dark-colored garage door or siding on your house that is relatively clean, that works great (white garage doors ALWAYS look dirty).
But don't limit yourself to just your house. Parks, community spaces, and small towns also harbor many great backdrops for quilt photos. I've found that your brand aesthetic is the thing that influences what backdrop will work best the most.
If you're brand aesthetic is:
Modern and abstract -> concrete retaining walls or cinderblock building walls work great
Floral and romantic -> try and wooden fence or wood-siding building
Traditional -> a barn wall is fantastic
Boho -> look for a public mural or art installation with fairly simple design
These are just a couple of examples, but basically, you're looking for any vertical surface that is fairly simple. You want your quilt to be the most interesting thing in the photo, not your backdrop. Surfaces that are fairly uniform in color and texture work best.
You may be thinking: how the heck am I going to find that? Go for a drive in your local area with new eyes specifically looking for these kinds of locations. You'd be shocked how many options there are. One of my favorite locations was a retaining wall 2 minutes down the road from me at a public parking lot.

One last thing, once you find a location that works, you're going to want to use it over and over again, so try to stay close to home. You don't want to have a to take a 30 minute or more drive every time you need to take some quilt photos.
How to hang a quilt flat
Getting a quilt flat is both the hardest and most important part of the process. A wrinkled or sagging quilt makes editing very difficult and often can’t be fully corrected.
The secret to doing this well is double-sided carpet tape. It's life-changing!
This tape is designed to hold rugs in place and is surprisingly effective for temporary quilt hanging. It adheres well to concrete, brick, wood siding, fences, and garage doors, and removes cleanly afterward.
Basic process:
Apply long strips of tape to the back drop surface
Peel the backing
Press the quilt into place
Pat it flat
This method eliminates the need for hanging sleeves, a volunteer, or expensive, purpose-built frames, and allows you to get a truly flat quilt quickly. Always test first on painted or fragile surfaces to make sure removing the tape doesn't damage the surface. Drywall is not ideal, but I've not had any issues with most surfaces, especially outdoors.
A practical shot list to cover you bases
Ok, now that we've covered the where and the how, let's talk about the what.
Photography becomes manageable when you take the decisions out of it. I use the same location, the same hanging method, and the same mental shot list for every quilt. This reduces the mental calories required and boils things down into a formula that is much easier for my brain to digest. All I have to do is follow the formula.
So let's talk about the shots you should take of every quilt.
1. Flat shot
This is your most likely cover image.
Stand square to the quilt
Turn on grid lines on your phone or camera
Keep edges vertical and parallel
Leave a small amount of background space
This shot may not be the prettiest or most interesting, but it shows your reader what they're buying and that's part of the purpose of the cover shot. Don't skip it.

2. Rule-of-thirds shots
Using the grid on your camera, position the quilt so the focal point lands on one of the intersections.
Shoot both portrait and landscape
Try slight angles instead of straight-on
These images are excellent for listings, blog headers, and promotional graphics.

3. Oblique shots
I take two types.
Non-distorted oblique: Step about 30° to one side while keeping the quilt’s orientation intact. This adds depth without warping the design.

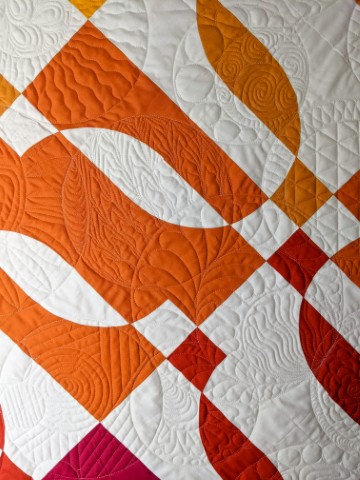
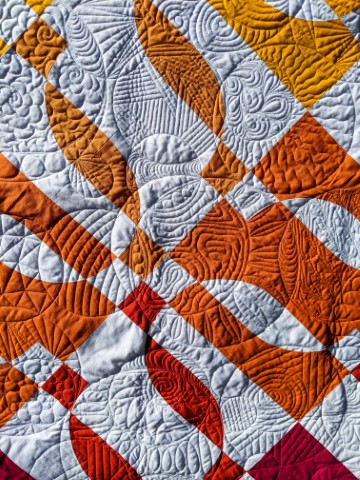
Distorted oblique: Crouch low and shoot from a corner. These images are intentionally disorienting and are excellent for highlighting texture and quilting detail.

4. Close-up video
Always capture a short video while the quilt is hung.
Slow pan across the surface
Slow zoom in or out
This footage becomes invaluable later for social media and listings.
As you get some experience photographing your quilts, you may find that you have some additional shots to add to this list. Awesome! You're getting experience, just write them down somewhere so you don't miss any whenever you plan a photoshoot.
Editing for enhancement
Editing should correct exposure, alignment, and color, not reinvent the photo or turn it into something it wasn't in real-life. Less is more here. Start with a decent photo taken in good, natural light and then just make minor tweaks to refine it. You don't need a lot of editing if you start with a decent photo and following the process above will help ensure that.
I use Adobe Lightroom, but phone editing apps work well too. I take a bunch of photos while I have the quilt hung and then edit later once I've gotten back home. Don't worry about this while you're photographing.
When you're editing, focus on:
Straightening
Minor brightness and contrast adjustments
Modest color saturation correction and temperature adjustments
Edit in that order: straighten/crop, then adjust brightness and contrast, then adjust the color and temperature (if needed)
Lightroom’s auto-adjustment is a good starting point. If you already use Adobe products for pattern writing, you likely already have access. The learning curve is minimal for basic corrections.
The important thing here is to not go overboard. It's really easy (for me) to just keep upping the anti on the color saturation because I love really punchy, saturated colors, but it's easy to go overboard and make the photo look unnatural. Less is more.
In this day and age, there's also a lot of AI photo editing softwares out there. I haven't used these much because if you take a good photo, the editing is really pretty minor. Feel free to play around with them as you like, but don't forget the purpose of the cover shot: to inspire and make your prospective customer fall in love with the design. If the image starts to look a little too perfect or artificial, that's a turn off and is going to work against you as you try to market your pattern.
Best practices
Develop a repeatable system and stick to it
Use the same shot list every time - Write this down in your notes app so you're not relying on your brain to remember each time.
Leave editing minimal and natural - Photos should feel authentic and real, especially in this new AI generated online world
Photograph quilts outdoors whenever possible - find a location you can return to over and over again
Test carpet tape on hanging surfaces before committing so you don't leave any damage behind
Consistency matters more than creativity here. You want your pattern covers to have a consistent brand aesthetic while still showcasing each individual design. By using the same location, similar lighting, and editing each time, you ensure consistency without having to think about it.
Things to avoid
Photographing quilts indoors without sufficient light - even with expensive soft box lighting, this is tricky at best. it's not worth your time.
Over-editing colors beyond reality
Cropping so tightly that scale is unclear
Skipping video capture - the interwebs LOVES video
Reinventing your process for every quilt -
The most common mistake is treating cover photography as a creative free-for-all instead of a production task. You don't need to spend half a day getting your cover shots; you've got a business to run and the return on investment just isn't there.
Final thoughts
Professional quilt pattern photography is not about talent; it’s about removing uncertainty and decision making.
Once you have a reliable formula, cover photos stop being a source of anxiety and become just another box to check. That confidence shows in your patterns and in how your brand is perceived.
The goal isn’t to love photography. The goal is to stop dreading it.


Comments